Wednesday, May 31, 2017

2DXY SlickMoves for SketchUp

Barry Milliken has developed 2DXY SlickMoves for sketchup. The extension is compatible with SketchUp 2016, SketchUp 2017. This sketchup extension contains 14 powerful tools of 2D graphics which are useful for any plane in 3D shape. Besides, these tools can be used to manage components and groups efficiently.

This extension offers the following features which are associated with power tools :-
• Rotate about Z axis by any angle (2 tools) • Mirror about center X or Y (2) • Resize (absolute or incremental) (1) • Align (Left, Center, Right; Top, Middle, Bottom) (6) • Equal Space (between objects or between their centers) (2) • Display the Active Plane and XY Axes on any group or component. (1)
Functionality:
• Choose one or more OBJECTS (Component Instances and/or Groups) • Click on one of the 14 SlickMoves tools. • All selected Objects will be "moved" with a single click

To download this extension, click on the following link. extensions.sketchup.com

~~~~~~~~~~~~~~~~~~~~~~~~~~
Published By
Rajib Dey
www.sketchup4architect.com
~~~~~~~~~~~~~~~~~~~~~~~~~~
Tuesday, May 30, 2017

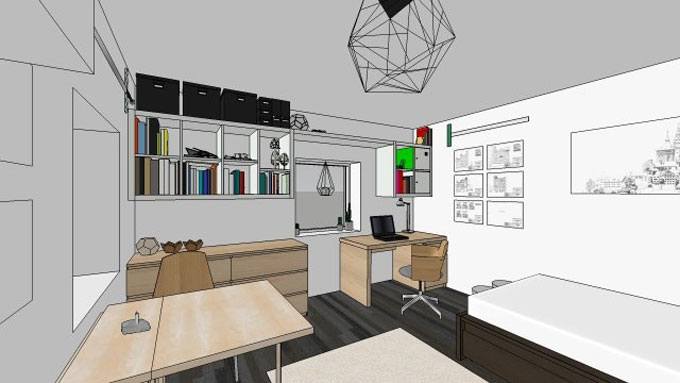
How to create home design plan with size 14m4 x 10m in sketchup

This sketchup video tutorial is presented by Sam Phoas that shows the step-by-step process for creating home design plan with size 14m4 x 10m in sketchup.
This plan is used to create the model of a two storied modern villa. In ground level of villa, there are living room, dining room, kitchen, office room, laundry, backyard and 1 restroom.
In first level there are master bedroom, 2 bedrooms, 2 bathrooms.

Sketchup is a very useful software for architects to carry out complete sets of either schematic or construction documents. Sketchup allows you to design your dream house, redesign your kitchen, or visualize position of furniture in your new apartment.

Read more

~~~~~~~~~~~~~~~~~~~~~~~~~~
Published By
Rajib Dey
www.sketchup4architect.com

~~~~~~~~~~~~~~~~~~~~~~~~~~

Monday, May 29, 2017

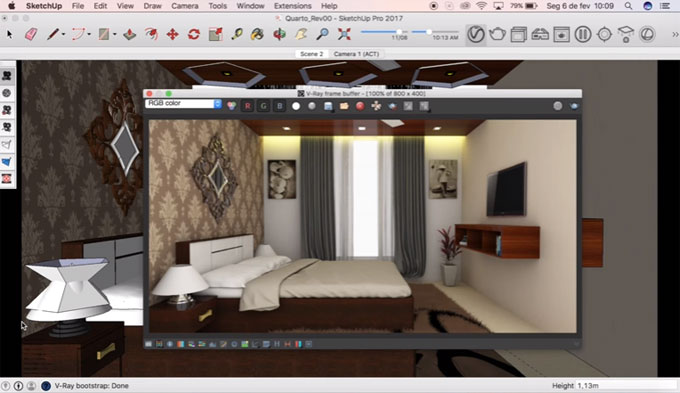
Demo of render farm to improve your rendering with sketchup vray

This sketchup vray video tutorial provides demonstration on the process of render farm.
A Render Farm comprises of a group of networked computers which operate jointly to execute large rendering tasks. Render farms moves silently, devoid of graphical demonstration of the renderings as they advance, or you can apply the Render Farm Display tool to show the parts of the image as soon as they are finished. The Render Farm facilitates you to utilize more compute power for lengthy tasks at the expense of some interactivity.
The nXt Render Farm contains four pieces of software:
1. IRender nXt is applied to state the model to render. The Render Farm is initiated directly from IRender nXt, or if it is required to preview the rendering first, a preview rendering can be started (with smaller resolution and fewer passes), and then start the Farm from IRender Batch.
2. The Farm itself, (nXt.exe ornXt64.exe, running on each Farm CPU). This belongs to a version of the nXt rendering engine which renders nearly mutely, in the background, requiring very little user interface. This portion of the nXt Render Farm Software is utilized by itself, in combination with commercial render farm software, for a more sophisticated render farm solution.
3. nXtFarmer.exe (nXtFarmer64.exe) is a small executable that operates on each network rendering station, waits for jobs to be produced, and begins the Farm Processor.
4. IRenderBatch.exe is a utility program to show renderings once they are completed and save them as .JPG, .PNG or .ArImage files.
Downloads: The IRender nXt Render Farm software can be downloaded from the McNeel nXt Forum: (accurender.ning.com)

• Render Farm Downloads
Make sure to download the version to tally your operating system (32 bit or 64 bit)

Read more

~~~~~~~~~~~~~~~~~~~~~~~~~~
Published By
Rajib Dey
www.sketchup4architect.com

~~~~~~~~~~~~~~~~~~~~~~~~~~

Friday, May 26, 2017

How to use sketchup for creating a house plan

This is an exclusive sketchup video tutorial. The tutorial shows how to create house plan measuring 6.5 m x 15 m in sketchup. Initially, import the autocad plan into sketchup and then start modeling in sketchup and at last render with v-ray sketchup.
The tutorial focuses on the following topics :-
Import Autocad
First Floor Modeling
Second Floor Modeling
Stair Modeling
Terrace Modeling
Fence Modeling
Special tip: How to get Inspire From other plan
Door and Window Modeling and the Final result sketchup vray render.

Sketchup is a powerful 3D modeling software that facilitates you to generate 3D shapes and objects. With the use of simple tools, it is possible to produce customized objects maintaining a high level of detail.


Sketchup is a useful tool for making a floor plan, specifically if you are going to workout the area of the floor. Generating the house plan can be accomplished in a 3D view or a 2D view. For a 2D view just click ‘Top View’ and parallel projection.


Read more

~~~~~~~~~~~~~~~~~~~~~~~~~~
Published By
Rajib Dey
www.sketchup4architect.com

~~~~~~~~~~~~~~~~~~~~~~~~~~

Thursday, May 25, 2017

Download Eneroth Zoom Back for SketchUp

Eneroth3 has developed Eneroth Zoom Back for sketchup. This sketchup extension is compatible with SketchUp 8, SketchUp 2013, SketchUp 2014, SketchUp 2015, SketchUp 2016, SketchUp 2017.

This sketchup extension is mostly suitable for interior views. It facilitates to move the camera as far backwards as possible devoid of striking anything.

At the time of making interior views, it is necessary many times to arrange the cameras as adjacent to a wall as possible to display as much of the room as possible, but devoid of zooming out via the wall by mistake.

This plugin positions the camera 1 cm ahead of whatever is straight behind it when the plugin is reactive. The distance is modifiable from the plugin's menu.

Click on the following link to download the plugin Eneroth Zoom Back

Download Eneroth Zoom Back for SketchUp

~~~~~~~~~~~~~~~~~~~~~~~~~~
Published By
Rajib Dey
www.sketchup4architect.com
~~~~~~~~~~~~~~~~~~~~~~~~~~

Wednesday, May 24, 2017

How to efficiently use advance camera tools inside sketchup

This sketchup tutorial will provide useful guidance on how to apply the advance camera tools inside sketchup to create an accurate framing of any scene.
As this toolbar can’t be enabled by default, one has to go to view and select toolbars and click on advanced camera tools and enable it.
In some sketchup versions, the Advanced Camera Tools tool is demonstrated as an extension, therefore it is required to go to the Extension Warehouse and download this extension. While going to download this extension, you should be logged in or else an error message will be shown on the page. After the download is completed, go to EXHENSION MANAGER WINDOW and activate the plugin.

It will put forward a toolbar in the interface. Just click the button with a camera and a "+" sign that will be produced by your camera. Set up your camera with the exact parameters suitable for your scene and you'll get a viewport view similar to the one you'll render.


The Advanced Camera Tools (ACT) are specifically developed toward people in the film and television industry who employ SketchUp pro to generate storyboards, design sets, visualize scenes, and plan locations. ACT can be used to arrange real-world cameras in your SketchUp models and preview real camera shots.
How to efficiently use advance camera tools inside sketchup

~~~~~~~~~~~~~~~~~~~~~~~~~~
Published By
Rajib Dey
www.sketchup4architect.com
~~~~~~~~~~~~~~~~~~~~~~~~~~


Tuesday, May 23, 2017

Download Hometeka Plugin for sketchup

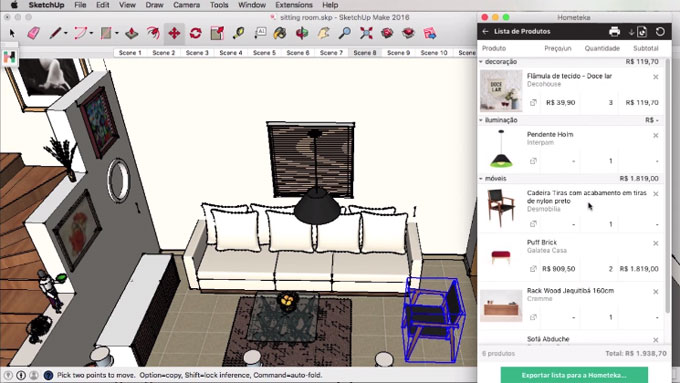
Hometeka Plugin for SketchUp is available in beta version. This newest plugin is compatible with SketchUp 8, SketchUp 2013, SketchUp 2014, SketchUp 2015, SketchUp 2016, SketchUp 2017. It is available in Brazilian and Portuguese language.
The Hometeka plugin provides the most efficient way to account and identify your interior design. There are over 3,000 products ready to be itemized and numerous textures and 3D models are accessible for free download.

One will be able to access this plugin from any device. Besides, one can examine budgets, edit, comment, and obtain the commissions from sales.
Check out the video that explains step by step how to use the plugin Hometeka for SketchUp.
Click on the following link to learn how to install this extension for sketchup 8 www.hometeka.com


To download the plugin, go through the following link. www.hometeka.com.br

Download Hometeka Plugin for sketchup

~~~~~~~~~~~~~~~~~~~~~~~~~~
Published By
Rajib Dey
www.sketchup4architect.com
~~~~~~~~~~~~~~~~~~~~~~~~~~

Saturday, May 20, 2017

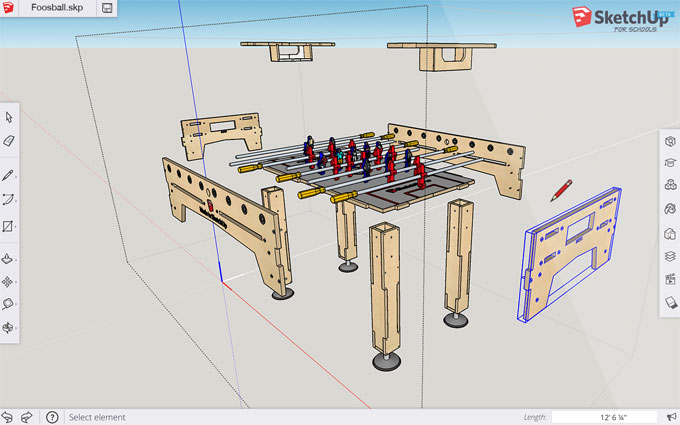
Sketchup For Schools – View sketchup in a web browser for Primary & Secondary School

SketchUp for Schools belong to the core SketchUp modeler accessible now in a web browser intended for any Primary or Secondary School that signs up with G Suite for Education (eduproducts.withgoogle.com).

With the popularity of G Suite for Education and Chromebooks in the classroom, the method of teaching has been changed significantly. SketchUp for Schools conveys the similar core modeling functionality into the web in order that the students can now unveil their creative potential from any location.
SketchUp for Schools is well matched with Google Drive and Google Classroom.
It is also compatible with chromebooks or any Internet-connected computer.
It can be accessed via the G Suite for Education Apps Marketplace (gsuite.google.com/marketplace) or the Chrome Web Store

Any K-12 school that has made registration with G Suite for Education will be able to avail SketchUp for Schools via the G Suite Marketplace. As soon as your school’s G Suite administrator set up the app, SketchUp for Schools will be available in your Google Navigation menu.
If any school already remains on G Suite for Education, you can provide your class a glimpse of the innovation of 3D modeling via SketchUp for Schools public beta. Sketchup for schools will be launched officially in due course for the 2017/’18 school year!
SketchUp for Schools will be in beta testing phase all through this summer. Experiment is still going on with some major functionality, like 3D printing.

To gather more information, visit SketchUp for Schools

Sketchup For Schools – View sketchup in a web browser for Primary & Secondary School

~~~~~~~~~~~~~~~~~~~~~~~~~~
Published By
Rajib Dey
www.sketchup4architect.com
~~~~~~~~~~~~~~~~~~~~~~~~~~

Friday, May 19, 2017

The move rotate tool for sketchup

The move rotate tool is a powerful sketchup extension developed by Idibri. This extension is compatible with sketchup 2016 and sketchup 2017. The sketchup users can apply this extension to move and rotate components and groups in actual time with text input. The users can convert their components and groups with live updating.
Application:
1. Choose a component.
2. Touch the menu button.
3. Type in a position or rotation in the X,Y,Z axes.
4. Watch it live update while typing.
5. Select ok or cancel

Notes:
• Position in meters or inches will be dependent on the settings of model
• Axis rotation in degrees
• Identified issue with modals in osx
To download this extension, click on the following link The MoveRotate Tool


~~~~~~~~~~~~~~~~~~~~~~~~~~
Published By
Rajib Dey
www.sketchup4architect.com

~~~~~~~~~~~~~~~~~~~~~~~~~~

Thursday, May 18, 2017

How to use placemaker sketchup extension to model a city instantly

In this sketchup video, Justin Geis shows how to apply placemaker sketchup extension to generate a city model in quickest possible time.
Placemaker is a handy extension created by Whaat. The plugin is compatible with SketchUp 2016, SketchUp 2017. It is available in different languages like Brazilian Portuguese, Chinese Simplified, Dutch, English, French, German, Italian, Japanese, Korean, Russian, Spanish.
With this extension, the users will be able to import OpenStreeMap roads, buildings, paths, water bodies, trees, as well as high resolution aerials in their design and insert context promptly.
PlaceMaker imports data from OpenStreeMap and DigitalGlobe and converts it into a functional site reference model appropriate for rendering or exporting into other applications.

To gather more information, click on the following link www.suplacemaker.com


~~~~~~~~~~~~~~~~~~~~~~~~~~
Published By
Rajib Dey
www.sketchup4architect.com

~~~~~~~~~~~~~~~~~~~~~~~~~~

Wednesday, May 17, 2017

FitParts – A powerful sketchup extension to generate cut list

Slavne has developed FitParts for sketchup. This sketchup extension is compatible with sketchup 2016 and Sketchup 2017. It is an exclusive cut list generator that can be used to create cutting layout. It can produce guillotine-style cut maps on the basis of panel dimensions you possess. It can automatically pull out dimensions out of components and groups, which are chosen presently, in sketchup model.
FitParts will be mostly suitable for woodworking, metal working, glass industry, plastic modeling.
You can adjust the length and width of sheet goods you have beforehand. FitParts extension will utilize the equivalent sheet goods and it sets how many of those it requires for procuring the essential parts. Then it will visually demonstrate in Sketchup each panel along with cut lines, dimensions and serial numbers of parts. The full report is acquired with legend describing each part serial number.

Methods step-by-step
1. Draw the model in Sketchup. Create groups and/or component instances for each desirable part to come into the cut list. Note: please apply normal method in sketchup at the time of drawing your model and do not give up un-grouped elements (faces, lines, etc) in the model as the FitParts drawing could mingle with your prevailing cluttered ungrouped elements. Besides, don't place them in x0y positive quadrant where your plans will be sketched.
2. Opt for the groups and components to be used for cut list. FitParts Pro contains the significant validation option to provide you an idea on what has been chosen in an improper way and what should be rectified if required.
3. Extensions / FitParts / MakeCutlist will display you the dialog where appropriate panel size is listed. Click the Cut button to produce the plans for cutting.

In order to download the plugin, click on the following link. FitParts


~~~~~~~~~~~~~~~~~~~~~~~~~~
Published By
Rajib Dey
www.sketchup4architect.com

~~~~~~~~~~~~~~~~~~~~~~~~~~

Tuesday, May 16, 2017

How to use Artisan Organic Toolset in Sketchup

Justin Geis has presented another exclusive sketchup tutorial that is based on Artisan Organic Toolset. This sketchup extension is develop by Dale Martens Aka Whaat and it costs $39. The users can avail a 15-days free trial version by clicking this link artisan4sketchup.com

This sketchup extension can be used for generating organic models in sketchup. Use it for sculpting to terrain modeling in sketchup. With it the designers can also create models for furniture, characters, abstract sculptures, fabric/curtains/pillows, rocks/tree trunks/plants etc.

It contains different types of powerful organic modeling tools like subdivision surfaces, sculpt tools, vertex transformation tools, mesh optimization (polygon reduction) etc.


To get a live demo, go through the following video.


~~~~~~~~~~~~~~~~~~~~~~~~~~
Published By
Rajib Dey
www.sketchup4architect.com

~~~~~~~~~~~~~~~~~~~~~~~~~~

Monday, May 15, 2017

WinDoor+ for sketchup for creating & editing doors

Francis Mc Shane, the renowned architect, has developed WinDoor+ for sketchup. This sketchup extension supports SketchUp 2016 and SketchUp 2017. This extension is available in English, French and German languages.
WinDoor+ is the combination of two powerful extensions i.e. Window+ and Door+. They both develop prevailing window and can be used for generating & editing door.
WinDoor+ is specifically created for building designers to produce and edit good-looking, well proportioned rectangular windows and doors efficiently.
WinDoor+ is utilized to generate complicated rectangular windows and doors instantly as well as edit them to appear similar to the windows and doors in the catalogue for your project by facilitating the users to modify the doorframe, door leaf and window profile sizes, glass/panel thickness and glass/panel retaining detail size. With the application of an easy and natural panel division algorithm, the extension can facilitate the users to divide the door leaf or window into any panel arrangement as per your choice.
Door+ allows the rapid formation of single, double and cottage doors. Door leafs range from plain or framed.
Both Window+ and Door+ can produce BIM data like profile lengths and glass and panel areas.

To download the plugin, go through the following link WinDoor+


~~~~~~~~~~~~~~~~~~~~~~~~~~
Published By
Rajib Dey
www.sketchup4architect.com
~~~~~~~~~~~~~~~~~~~~~~~~~~

Thursday, May 11, 2017

How to apply position texture tool inside sketchup to generate custom textures

This sketchup video tutorial from Justin Geis is based on position texture tool of sketchup. By going through the video, one can learn how to use texture tool to take texture in sketchup and resize and rotate for generating a custom texture.

Inside SketchUp, materials are used as tiled images which signify that the pattern or image will reiterate both vertically and horizontally over any entities you paint.

SketchUp's Position Texture Tool is useful for modifying a material on a surface in various ways, together with repositioning, resizing, and distorting. Besides, this tool facilitates you to carry out distinctive actions on images like painting a picture encircling a corner or projecting it on a model.


Run the Position Texture Tool from the context menu. (sites.google.com) for a face entity.


~~~~~~~~~~~~~~~~~~~~~~~~~~
Published By
Rajib Dey
www.sketchup4architect.com

~~~~~~~~~~~~~~~~~~~~~~~~~~

Wednesday, May 10, 2017

Shape Loader for SketchUp

István Nagy develops Shape loader for sketchup. This newest sketchup extension supports SketchUp 2014, SketchUp 2015, SketchUp 2016, SketchUp 2017. This extension can be applied to shape loading and resizing with your mouse.
After setting up MSPhysics, include a “grounds” item to the toolbar. Use the following keyboard shortcuts for performing the following activities :-

- Press the ( Ctrl ) key to obtain equilateral shape.
- Press the ( Shift ) key to obtain symmetrical shape.
- Press the ( Up arrow ) key for change quality.

To download the plugin, go through the following link extensions.sketchup.com


~~~~~~~~~~~~~~~~~~~~~~~~~~
Published By
Rajib Dey
www.sketchup4architect.com

~~~~~~~~~~~~~~~~~~~~~~~~~~

Monday, May 8, 2017

Auto Magic Dimensions – The newest sketchup plugin from Brighter 3D

Brighter 3D has developed Auto Magic Dimensions for sketchup. This sketchup extension supports SketchUp 2016, SketchUp 2017.
One can use this plugin to include dimensions to any drawing with a simple mouse click without any difficulty.
This sketchup plugin can accelerate your work flow by assigning dimensions to raw geometry or Groups and Components. The dimensions are included with the layer automatically which are arranged with while clicking on a button. It facilitates the users to switch off layer at the time of observing their drawing with multiple dimensions displaying. The plugin contains various in-built advanced unseen features. As for instance, the offset of the dimensions can be fixed in the settings option. This is an exclusive feature because the sketchup users will not be able to perform this with sketchup native tool. Dimensions are included with multiple groups as well as gaps among groups with a simple mouse click. As for instance, a run of kitchen cabinets is chosen and with one click all the sizes show automatically.


The dimension in 3D space can be easily moved and if you need the sizes demonstrated on the back of an object rather than the front, just retain a modifier Key.

Download a 14-days free trial version. extensions.sketchup.com


~~~~~~~~~~~~~~~~~~~~~~~~~~
Published By
Rajib Dey
www.sketchup4architect.com
~~~~~~~~~~~~~~~~~~~~~~~~~~


Saturday, May 6, 2017

Learn to make Hexagonal Lattice Shapes with sketchup and shape bender

This is another useful sketchup extension tutorial presented by Justin Geis. The tutorial will provide some useful assistance to generate Hexagonal Lattice Shapes with the use of sketchup and shape bender.
Here, the model is created with Sketchup 2017.

Shape Bender is a useful sketchup extension developed by Chris Fullmer. It can be used to enfold objects over curved paths. The extension can generate curved with greater precision.


The tool facilitates the users to indicate the specific area to be fit along a path and the shape bender plugin automatically sets the object along the path. The users can keep control of flipping the object either inside or outside the path area.


Read more

~~~~~~~~~~~~~~~~~~~~~~~~~~
Published By
Rajib Dey
www.sketchup4architect.com

~~~~~~~~~~~~~~~~~~~~~~~~~~

Friday, May 5, 2017

Some useful tips for improving your exterior rendering

This sketchup video tutorial is the part of the Revit-Sketchup-Vray-Photoshop-Workflow. The video will introduce you with some useful tricks necessary for performing exterior rendering with sketchup vray. The tips will enhance the quality of your renderings.
The video focuses on the following topics :-
01. Model What You See
02. Pick the Time of Day
03. Render in Eye-Level View
04. Render in 2-Point Perspective
05. Do Quick Test Renders
06. Know Your Resources
07. Use Sketchup Materials When You Can

08. Use VFB Channels
09. Use Settings Presets
10. Render Size Should Match Sketchup Aspect Ratio

Read continue

~~~~~~~~~~~~~~~~~~~~~~~~~~
Published By
Rajib Dey
www.sketchup4architect.com

~~~~~~~~~~~~~~~~~~~~~~~~~~

Thursday, May 4, 2017

Parametric Skyscraper Designer for sketchup

Parametric Skyscraper Designer is a useful sketchup extension that is used to generate conceptual project and 3d model of skyscraper or even the complete city with a few mouse clicks in parametric manner.
This sketchup extension is compatible with skethup 2017.
This sketchup extension is specifically designed for architects, urban planners, 3d artists and video game graphic designers.
How does it function
1. Generate a shape of the ground floor in SketchUp and opt for the face that illustrates it.

Any type of tool like rectangle, polygon, circle, line or even freehand tool can be applied for this purpose. The final shape should fulfill the following requirements:
• Be horizontal and planar
• Contains only one face
• Does not include holes

2. Open Parametric Skyscraper Designer™. Under sketchup menu, visit "Tools->Parametric Skyscraper Designer. Alternatively one can click on the parametric skyscraper designer icon.


3. Modify the settings and click Generate Skyscraper and the skyscraper is ready to be used.
For more information, visit skyscraperdesigner.com

~~~~~~~~~~~~~~~~~~~~~~~~~~
Published By
Rajib Dey
www.sketchup4architect.com
~~~~~~~~~~~~~~~~~~~~~~~~~~

Wednesday, May 3, 2017

Simplify your construction drawings with Sketchup LayOut 2017

This sketchup time-lapse video presents some simple process for performing annotation & completing construction drawings with the use of Sketchup LayOut 2017.
LayOut provides a quick and simple way to generate documents out of any 3D model, where you will be able to demonstrate your designs, elevations, plans and sections.
SketchUp can also be utilized for drawing plans, elevations, details, title blocks and other graphics with LayOut. If any modification occurs to the model, your document will also be changed.

With Layout you can get an illustrated construction documents with the use of color and textures to demonstrate the building materials. It is also possible to render a sense of depth in the viewports with fog and shadows. Highlight vital elements with vector rendered linework viewports.

Read more

~~~~~~~~~~~~~~~~~~~~~~~~~~
Published By
Rajib Dey
www.sketchup4architect.com

~~~~~~~~~~~~~~~~~~~~~~~~~~