Saturday, December 30, 2017

Always Use Proxy Components in SketchUp for Faster Rendering

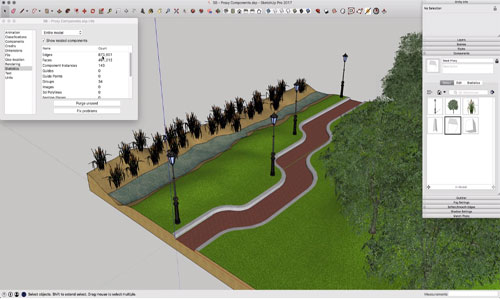
Rendering is always a time-taking task, no matter what application you use. SketchUp offers some easiest solutions that not only make your design better than others but also speed up your modeling process. Proxy components are such time-saver feature that allows you to work faster on your model and get a picture realistic rendering.

Proxy component, in SketchUp term, is used to replace objects with high-poly counts so that you can avoid the delay to complete the rendering. Saving time in rendering will let you focus on other designing detail of your SketchUp.

You can use both low-poly and high-poly count in Proxy component as per your requirement. Creating models and setting their views will preferably be done with the low poly version. The high-poly count is used for the rendering that maintains the quality of the picture. Current components of your model get the required replacement with this feature. You can use the same name for replacing your current component with low poly and high poly geometry. You can also create a new component with a different name that has high-poly layer in the original form and low poly geometry in low poly layer.

How to create a Proxy component: Creating a proxy component follows simple steps. Right a click on the component you want to replace and choose Create Lo-Poly Proxy Component from RP Tools submenu. You need to select the options you want for your model and click ‘OK’.

After clicking Create Lo-Poly Proxy Component option, you will get a dialogue box containing all essential details that you need to choose.


These are:

• Replace existing component
• Create component with new name
• Criss-cross images
• Wireframe Bock

Criss-cross proxy object can be restored to the previous position with choosing restore component from Lo-Poly proxy.

Terms that you need to know:

• Criss-cross images – As the name says, your model will appear in crisss-cross look for thumbnail image.
• Block with images – it blocks the images of the original component.
• Wire Frame Block – wire frame blocks will replace the components you select.

Layers after conversion:

• Low-Poly On – component with low poly geometry will be displayed.
• Hi-Poly On – the original component and geometry will be displayed.
• Both on – both layers are turned on in your model.

Proxy components solve the most complex problem while designing on SketchUp. Rendering always takes times and it slows the system. With this feature, you can easily avoid the issue and make your rendering better and faster.

Here is also a link of a video tutorial that will guide you on how you can create proxy components.

Article Source: renderplus.com

Always Use Proxy Components in SketchUp for Faster Rendering


~~~~~~~~~~~~~~~~~~~~~~~~~~
Published By
Rajib Dey
www.sketchup4architect.com
~~~~~~~~~~~~~~~~~~~~~~~~~~

nz_Gradients&Driveways – The newest sketchup extension

Natale Zappia has developed nz_Gradients&Driveways. It is the newest sketchup extension that supports SketchUp 2016, SketchUp 2017, SketchUp 2018 as well as Mac OS X and Windows platform.

The plugin is suitable for different industries like Architecture, Construction, Education, Engineering, Heavy Civil, Landscape Architecture, Urban Planning etc.

The plugin is used to define the necessary gradients & transition zones toward your driveways & vehicular access ramps. This extensions help in computing or transforming gradients into falls (1/distance), % grades or .deg. Visually calculate as well as label a grade among any two points.

FEATURES:

CODE SETTINGS
Facilitates the users to set global requirements in compliance with your Local Authorities
Indicate Local Authorities and Legal Requirements.


USER SETTINGS
Personalize/Override/Elaborate on the CODE settings to meet your specific needs.

DRIVEWAY
This tool can be applied to draw a ramp to the maximum permissible grade.

If the grade surpasses the permissible grade then the tool will automatically compute and draw an appropriate ramp with the necessary transition zones, with reference to CODE and USER settings. Under this situation, it will also relate priorities the Drop(RL) or the Length with regard to your optional preference.

To get more information on this plugin, go through the following link extensions.sketchup.com

For more clarification, watch the following video tutorial.

~~~~~~~~~~~~~~~~~~~~~~~~~~
Published By
Rajib Dey
www.sketchup4architect.com
~~~~~~~~~~~~~~~~~~~~~~~~~~

Friday, December 29, 2017

Landscape designing software – A Better Visualization of Your Design

Landscape planning is a most needed step, especially for a new home. Expert designers carve out the best plan for a landscape after analyzing the views, activities and environments of the location. Traditionally, the plan is designed with pencil and paper that is not only time-taking but also ineffective for redrawing. Though it is considered to be the organic way of a design, today’s designers are looking for easy alternatives.

Professional landscape designing software applications are designed by companies to help designers add details as perfectly as they visualize.

Landscape designs on paper are more like an artistic job where designers consider and measure each detail very carefully. The downfall of such designs is nothing but a lack of efficiency. Redrawing of the designs is time-consuming, and getting a proper visualization is also very difficult.

3D landscape design software applications are growing in numbers with time. The useful applications and tools carry everything that is needed to make a proper plan for your landscape. Google SketchUp proves to be handy as it allows even beginners to design like an expert.

Drawing landscape on paper does not communicate well with the clients. The plans even fail to cut the mark due to the lack of clarity. This is why landscape designing software applications outrun the former one and make a strong place in the designing tool of the planners.

These software applications are also not free from shortfalls. Students and designers who are confident on designing in a conventional way feel uncomfortable with these tools. They need to go through an extensive training program to learn the application first before drawing a design using the tools. The applications are costly and they require a timely update.

The above-mentioned problems of 3d landscape design software are minor ones that can easily be eliminated. The benefits of these applications are countless and they bring the profit-driven result also. A better communication with the clients is established by the software application.

Advantages make you convinced that professional landscape design software application is a necessary tool for the designers. You can develop a master plan with colors and details that add a real look to your model. Editing any part of your design is not worrisome; rather it is an easily executed work by the designers.

Creating perspective photo through pencil is a hard and time-consuming job, and the end result is also not as clean as the design done by software application. You can prepare a virtual photo of your design with all meaningful aspects. Trees, flowers, sidewalks and other necessary details of landscape design are preloaded in the software application so that you can drop them in your design as per you like.

Generally, 3D designs software tools like SketchUp come up with all important things required for designing a landscape. Companies, though, go further and create applications specially designed for sketching landscape digitally. 3D images and designs take clients to the virtual landscape and give them a real-time thrill to walk through the design.

Article Source: postandcourier.com

Landscape designing software – A Better Visualization of Your Design


~~~~~~~~~~~~~~~~~~~~~~~~~~
Published By
Rajib Dey
www.sketchup4architect.com
~~~~~~~~~~~~~~~~~~~~~~~~~~

Thursday, December 28, 2017

VBO Piping – The newest sketchup extension

VBO Solutions develop VBO Piping, a useful sketchup extension that generates pipes from edges in selected groups/components as well as includes fittings to vertices.

It has the capability to update after edit the source (group/component of edges), and replace/edit the fittings, size etc.

The plugin supports SketchUp 2017, SketchUp 2018.

Application:

- "Create Pipes Branch": All inside edges of selected group(s)/component(s) will be converted to pipe with options (collection, size, type of ending fitting and continue fitting) and are chosen in an input box.

- "Branches modifier": It refers to a tool that facilitates to edit fitting. The user will be able to rotate, replace fittings by hand, add/replace & reduce bush, redraw branch(es). Besides, specify name and add color to any branch(es).

- "2D/3D": A rapid changing for showing the branches in 2D/3D view, stand on turn on/off the layers "8_mep_piping2D" and "8_mep_piping3D".

- Double click (Edit Group/Component) to a branch will facilitate the user to edit the source edges and vertices. The branch will be updated to it's "settings" as soon as the Group/Component editing will be finished by the users.

- Can generate a BOM (Bill Of Materials) of pipes and fitting by applying preset "PIPING" in VBO_Schedule Plugin.

To download the plugin, visit the extension warehouse extensions.sketchup.com

For more clarification, watch the following video tutorial.

VBO Piping – The newest sketchup extension

Read Continue

~~~~~~~~~~~~~~~~~~~~~~~~~~
Published By
Rajib Dey
www.sketchup4architect.com
~~~~~~~~~~~~~~~~~~~~~~~~~~


Tuesday, December 26, 2017

Demo of VizPro for SketchUp

This sketchup video tutorial provides the demonstration of Viz parametric modeling sketchup extension.

The tutorial briefly explains how to operate through the extension as well as generate a basic parametric model in sketchup. The extension sustains all the modeling history.


Parametric modeling means monitor the steps to generate the model in order that the objects are modified in due course devoid of undo and redo the various steps.
To get started go to the menu Extensions -> Viz -> Start Viz, or click the Vz button on the toolbar. As soon as the Viz Pro window opens, press Spacebar key to include new nodes.
INSTRUCTIONS FOR INSTALLATION:
1. In SketchUp, choose Window > Extension Manager.
2. Click the Install Extension button.
3. A open dialog box will be visible, then navigate to the .rbz file saved to your computer, choose the file, and click OK (Microsoft Windows) or Open (Mac OS X).
4. Restart SketchUp
Watch the following video to learn the complete process to create parametric modeling in sketchup.
Video Source: fluidinteractive
~~~~~~~~~~~~~~~~~~~~~~~~~~
Published By
Rajib Dey
www.sketchup4architect.com
~~~~~~~~~~~~~~~~~~~~~~~~~~

Friday, December 22, 2017

Learn the application of 1001 bit Plugin in SketchUp

This sketchup video will introduce the functionalities of 1001bit Tools (Freeware). It is an exclusive sketchup plugin that contains different types of tools to produce architectural components in quickest possible time. GOH CH has developed this sketchup extension. It is compatible with SketchUp 6, SketchUp 7, SketchUp 8, SketchUp 2013, SketchUp 2014, SketchUp 2015.

The architectural components range from Staircases, spiral staircase, windows, doors, walls, customized openings on walls as well as automatic creation of hip roofs, rafters and purlins etc.


Inside 1001bit tools, there are some effective drawing and editing tools such as fillet edges, extend, chamfer etc.
The users can also save the parameters, which are normally utilized, for easy selection in future.
To download a 30-days trial version, click on the following link www.1001bit.com
Watch the online demonstration of the plugin

Learn the application of 1001 bit Plugin in SketchUp


~~~~~~~~~~~~~~~~~~~~~~~~~~
Published By
Rajib Dey
www.sketchup4architect.com
~~~~~~~~~~~~~~~~~~~~~~~~~~


Thursday, December 21, 2017

Shapespark is useful sketchup extension to view your rendering in real time

In this sketchup video tutorial, Minh from Architectural Inspirations, presents a useful video that shows how to use shapespark for creating rendering in real time.

The software also facilitates the users to observe their renderings on any browsers.


The video covers the following topics :-
Download Shapespark
Importing the 3d model to Shapespark
Brief description of movement controls
Previewing and baking the scene
Editing materials
Adding lights with Sketchup
Modifying strength of lights in Shapespark
Adding pre-defined views to the scene
Hiding objects from views
Uploading to the internet
With Shapespark, it is possible to generate and distribute real-time 3D visualizations that can operate through any modern web browser as well as on mobile gadgets, devoid of any plugins.
The visualizations are generated in the Shapespark desktop application and then uploaded to the Internet with the purpose of distributing and implanting on websites.
SketchUp is supported via a devoted extension that facilitates to export a model to Shapespark without any difficulty.
This sketchup extension is compatible with SketchUp 2015, SketchUp 2016, SketchUp 2017.
To watch online demonstration, go through the following video.
To download a 30-days free trial version, visit the website. https://www.shapespark.com/


~~~~~~~~~~~~~~~~~~~~~~~~~~
Published By
Arka Roy
www.sketchup4architect.com
~~~~~~~~~~~~~~~~~~~~~~~~~~

Wednesday, December 20, 2017

How to use SketchFX to apply layering styles in a sketchup model

In this sketchup video tutorial, you will learn different processes to generate a split or radial style overlay in sketchup with the use of SketchFX.

It facilitates the users to apply layer styles on top of each other to provide new effects in sketchup. The entire tutorial is created by using sketchup 2017.

SketchFX assigns artistic rendering to SketchUp. With the simple click of mouse, it is possible to make elegant previews of your models, selecting from a wide array of custom-made presets (watercolor, pencil, depth-of-field, motion-blur and various others)..

SketchFX is available in two versions like SketchFX Pro and SketchFX Ex.

Given below, some exclusive features of SketchFX

Huge list of pre-set custom rendering effects;
AmbientOcclusion incorporation;
Numerous filters exist to form your own effect which range from hue-saturation-value, brightness-contrast, gamma-exposure, blur, radial blur, bloom, fog, depth of field, vignette, artistic paint, image from file, scene, style and constant color, scene transition, masks.


To learn how to give layering styles in sketchup with SketchFX, watch the following video tutorial.

Video Source: TheSketchUpEssentials

~~~~~~~~~~~~~~~~~~~~~~~~~~
Published By
Rajib Dey
www.sketchup4architect.com
~~~~~~~~~~~~~~~~~~~~~~~~~~

Tuesday, December 19, 2017

nz_ConvertMe – The newest sketchup extension

Natale Zappia develops nz_ConvertMe, the newest extension available in extension warehouse.

The extension can be used for the mass-conversion of Groups and Component to compare with component Identity, it is also applicable for the mass-conversion of Components to Groups and vice-versa. The plugin supports SketchUp 2016, SketchUp 2017 and SketchUp 2018.

nz_ConvertMe: This extension allows for the mass-conversion of Groups and Component to tally a previously selected Component Identity, it also facilitates the mass-conversion of Components to Groups and vice-versa.

With this plugin, the users will be able to remove various tedious steps by obtaining the desired end result directly.

The plugin offers the following exclusive feartures :-

ConvertMe To Components: Transform all groups inside a selection into individual components. Remember that the axes are now put to world axes as is normally the case inside the Sketchup Environment. The components which prevail previously inside the selection will stay intact.

ConvertMe To Groups:
Transforms all components inside a selection in to groups


Extract ID
Extracts the Component ID according to your choice while transforming future Components or Groups


Apply ID
Transforms all Groups and Components inside a selection that is equivalent to the Extracted ID
Link to download this sketchup extension extensions.sketchup.com
nz_ConvertMe – The newest sketchup extension

~~~~~~~~~~~~~~~~~~~~~~~~~~
Published By
Rajib Dey
www.sketchup4architect.com
~~~~~~~~~~~~~~~~~~~~~~~~~~


Monday, December 18, 2017

How to render a bedroom with vray 3.4 for sketchup 2017

This is an excellent video tutorial for sketchup vray users. The tutorial briefly explains how to use v-ray 3.4 in sketchup 2017 along with photoshop to perform interior rendering of a bedroom.

The rendering is done through v-ray asset editor. The V-Ray Asset Editor contains four different tabs ranging from Material Editor, Light Editor, Geometry Editor, and Render Settings Tab. These can be utilized for controlling V-Ray assets and settings.

Asset Editor Button is available in V-ray Toolbar. One can also avail it from Extensions > V-Ray > V-Ray Render and Options > Asset Editor.

Material Editor tab provides information and manages all the materials in the sketchup scene.


Light Asset Lister/Editor tab comprises of information and manages all the lights in the sketchup scene.

Geometry Asset Lister/Editor tab comprises of information on v-ray geometry assets in the sketchup scene.

V-Ray Render Settings tab provides controls for the V-Ray renderer.

Watch the online demonstration.

Read Continue


~~~~~~~~~~~~~~~~~~~~~~~~~~
Published By
Rajib Dey
www.sketchup4architect.com
~~~~~~~~~~~~~~~~~~~~~~~~~~

Saturday, December 16, 2017

Demonstration of 2d Tools Plugin

In this sketchup video tutorial, Justin Geis, briefly explains the utility of 2d tools plugin developed by TIG. This plugin can be used to model in 2d dimension easily.


The plugin includes the following toolset :-
2D freehand tool, 2D arc tool, 2D circle tool, 2D polygon tool, Facemaker tool, 2D hatching tool, 2D adjust tool, 2D line style, 2D text tool, 2D polyline edit tool
The plugin is mainly created to provide you a series of tools which have similarity to those available in other CAD packages to facilitate you drawing in two dimensions.
To set a Z plane, lock your height above ground for the tools utilized by you. It can also set your plane corresponding to an existing plane. As for instance Type +24 to set a new plane 24 inches above the plane that is already active or type -24 to set a plane 24 inches underneath the plane that is already active.
It can also be set to generate both lines and guide lines by clicking on the control key. Besides, one can generate lines as welded sets or separate lines by clicking on the alt key. You can set your z-plane within this tool by clicking on the tab key.
The plugin is free and can be downloaded from the following link sketchucation.com
For online demonstration go through the following video.
Video Source: TheSketchUpEssentials
Read more

~~~~~~~~~~~~~~~~~~~~~~~~~~
Published By
Rajib Dey
www.sketchup4architect.com
~~~~~~~~~~~~~~~~~~~~~~~~~~

Friday, December 15, 2017

Meedek Truss Plugin – Online demonstration to create trusses into your sketchup model

This sketchup video tutorial is based on Medeek Truss Plugin. Learn how to use this plugin for creating nice trusses within your sketchup model (provide roof truss framing onto model) quickly and smoothly.

The plugin can automate the process to generate the geometry of the trusses.

It arranges a simple interface for producing precise 3D truss and roof geometry inside SketchUp. This plugin applies the SketchUp Ruby API programming interface. The plugin is well matched with the most updated versions of sketchup like (SketchUp Make 2017 64-bit and SketchUp Pro 2017 64-bit) together with the earlier versions (2013, 2014, 2015, 2016).

The plugin is specifically designed for architects, engineers, designers and homeowners who are applying SketchUp as their prime 3D design tool.

The plugin facilitates the user to make a series of trusses by just choosing three points which create the bounding rectangle (bldg. width x bldg. length) of the truss array. The number of trusses is automatically computed on the basis of the on center spacing and the building length.

The plugin is combined with the Medeek Beam Calculator and can automatically load the design parameters from SketchUp so as to verify bending, shear, bearing and deflection for typical North American glulam beam sizes.

The plugin is available in extension warehouse extensions.sketchup.com


~~~~~~~~~~~~~~~~~~~~~~~~~~
Published By
Rajib Dey
www.sketchup4architect.com
~~~~~~~~~~~~~~~~~~~~~~~~~~

Thursday, December 14, 2017

3D Printing Extension – The sketchup plugin just launched

i.materialise, an online 3D printing platform, has developed 3D printing extension. It is the newest sketchup extension that supports SketchUp 8, SketchUp 2013, SketchUp 2014, SketchUp 2015, SketchUp 2016, SketchUp 2017, SketchUp 2018.


This extension will be useful for architecture, education, engineering, gaming and interior design.
Just upload your SketchUp model to i.materialise and receive a quick quote. Select from more than 100 various 3D printing materials and finishes.
1. Set up the extension from the Extension Warehouse,
2. As soon as it is installed, it will be situated in SketchUp under “Extensions > Print 3D”,
3. Just click “Print 3D i.materialise” to upload your design directly from SketchUp,
4. Select from 100+ various finishes and materials (along with metals!),
5. Get an instant price quote,
6. Printing and shipping the design will be handled by i.materialise.
This sketchup plugin is available in extension warehouse extensions.sketchup.com


~~~~~~~~~~~~~~~~~~~~~~~~~~
Published By
Rajib Dey
www.sketchup4architect.com
~~~~~~~~~~~~~~~~~~~~~~~~~~

Wednesday, December 13, 2017

How to design a staircase with sketchup & render with v-ray 3.4

In this sketchup tutorial, one can learn how to design the stairs with sketchup and render with v-ray 3.4.

In sketchup, it is possible to apply components for generating repeating shapes. These components can be utilized to develop a staircase instantly without any trouble.

Sketchup can also multiply objects. One can select an object that contains repetitive values like a staircase and obtain the number of copies computed through sketchup.

Watch the following video tutorial to learn the step-by-step processes.


Video Source: Rio Ryne


~~~~~~~~~~~~~~~~~~~~~~~~~~
Published By
Rajib Dey
www.sketchup4architect.com
~~~~~~~~~~~~~~~~~~~~~~~~~~

Tuesday, December 12, 2017

nz_PolyhedralJunctions – The newest sketchup extension

Natale Zappia has developed nz_PolyhedralJunctions. This newest sketchup extension is well matched with SketchUp 2016, SketchUp 2017 and SketchUp 2018.

The plugin is specifically designed for Architecture, Construction, Education, Engineering etc.

NZ_PolyhedronJunctions comprises of nz_Edge2Polygon to generate Polygons and Polyhedral Junctions maintaining perfect reference edge lengths. It also articulates & connects triangles. It allows the user to generate and personalize platonic/polyhedrons and archimedean solids as per your exact dimensions and requirements from the ground up devoid of depending on external imports. Polyhedral Juctions of the platonics are set all through nature and most effective while arranging balanced loads concerning a point.


This tools match well when anyone is going to generate self-similar compositions.
Download this extension from extension warehouse extensions.sketchup.com

nz_PolyhedralJunctions – The newest sketchup extension

~~~~~~~~~~~~~~~~~~~~~~~~~~
Published By
Rajib Dey
www.sketchup4architect.com
~~~~~~~~~~~~~~~~~~~~~~~~~~


Friday, December 8, 2017

nz_Descendants – The most updated sketchup extension

Natale Zappia has developed nz_Descendants. This is the newest sketchup plugin that is compatible with SketchUp 2016, SketchUp 2017, SketchUp 2018.

The plugin can be used for diverse industries like Architecture, Construction, Engineering, Film & Stage, Heavy Civil, Interior Design, Kitchen & Bath, Landscape Architecture, Urban Planning, wood working etc.

The plugin has same functionality like PushPull tool in sketchup. With this plugin, the users will be able to extrude various faces to a distantly selected reference length. It produces the consequential shapes into an independent group keeping the original face/object as it is. This plugin can function on several faces instantly.

The plugin saves huge time and allows for modelling in a non-destructive way.

This convenience makes it possible for generating similitudes and modelling in a non-destructive fashion if applied with Sketchup: SolidTools.

Similitude:

By re-applying accessible dimensions, it is possible to generate self-similar objects which at the same time as not fractals yet sustain a subliminal sense of unity to enhance a project.

Non-Destructive Modeling:

If this plugin is utilized along with Sketchup: Solid Tools, the users can model maintaining their original source objects intact. Once related elements are produced, reunite or manipulated them with Sketchup:SolidTool and still sustain your original sources if it is necessary.

It is mostly effective while dealing with joinery, or any situation where a surface can become an interrelated element. Apply nz_Desendants to generate the subsequent/adjacent element easily.

nz_Descendants – The most updated sketchup extension


~~~~~~~~~~~~~~~~~~~~~~~~~~
Published By
Rajib Dey
www.sketchup4architect.com
~~~~~~~~~~~~~~~~~~~~~~~~~~

Thursday, December 7, 2017

Learn to render in sketchup with some easy to follow steps

In this sketchup video tutorial, taught by Alex Oliver, the founder of sketchup school, you will be familiar with a unique method that can be applied to obtain a nice rendering from sketchup.

This method supports various rendering extension like v-ray, SU Podium, Shader Light etc.

It is known as photographer method. The method facilitates the students to gather knowledge on how to approach renderings in sketchup.

The video focuses on the following topics :-

- a brief synopsis of the types of rendering extensions along with a link to a page from where the exact rendering extensions can be selected)


- A brief tutorial on how to arrange professional 2-point lighting for your renderings
- 3 easy Photoshop recipes for rapidly improving your SketchUp renderings.
In sketchup the rendering extension provides you all the gear as you require them along with camera and lights. With photographer method it is possible to set up excellent lighting.
To gather more details, watch the following video.
Video Source: SketchUp School
~~~~~~~~~~~~~~~~~~~~~~~~~~
Published By
Rajib Dey
www.sketchup4architect.com
~~~~~~~~~~~~~~~~~~~~~~~~~~

Wednesday, December 6, 2017

Client Communication: the key to better projects

Delivering SketchUp models to the clients through right communication is important for projects and Nick shows in his video. Communication doesn’t stand only about speaking to and hearing from people, but more than that it is about understanding the total message. A good communication depends on many things like the language will use, delivering message with the tone of respect, the feeling and the body language at the time of talking. These all play important roles in every communication process and can also deliver a confused and wrong message if they used in a wrong way.

In every organization, project manager has the main role of communicating with others such as clients, co-workers, advisors, dealers etc and also responsible to present the right message to the right person at the right time.

Communication is a symbol of the “transfer of information form one individual to another”. It is seen that the failure reason of the projects basically is the miscommunication, most of the project deliverers fail to clearly understand the vision and the project’s success criteria. This vision should be strongly communicated to each shareholder and team member and the whole team must be able to understand the total result for working together for a common goal.

A poor communication can certainly damage any project or relationship and break down the strength of the project. For a good communication one has to be knowledgeable about every detailed and updated thing about a project so that he could deliver the right information to the clients or shareholders.

It is not that this problem happens only in some cases or happens in certain time; it has become a regular problem and harming the growth of the projects. A right communication to all the shareholders in a clear and actual manner is the capital thing as it clears about the kind of the delivered messages.

When you are in the field of architecture or design, communication plays the most vital part in every project and through 3D communication tools it has become easier to communicate with various people over a project at a time. A rich communication with full of right knowledge and information makes a project more successful and in SktechUp it is also important.

SktechUp is not only a tool for modeling and designing it also known for its sharing capacity in 3D. Often designers make models and show the idea through the 3D communication system to their clients or other teammates as a presentation or for opinion. A good representation of the works of models, their designing, capacity and way of working will become the reasons of success and the bad one cause failure.

To improve the communication way Nick Sonder, a member of SketchUp team has guided everyone with his wonderful SketchUp models and LayOut documents. Nick himself is a brilliant commuter and makes a good communication with the clients throughout the whole process and with the help of his friend, Houzz he had organized design ideas and collaborated with others. He has some brilliant concepts and produced a video tutorial as guide for all.

Article Source: blog.sketchup.com

Client Communication: the key to better projects

~~~~~~~~~~~~~~~~~~~~~~~~~~
Published By
Rajib Dey
www.sketchup4architect.com
~~~~~~~~~~~~~~~~~~~~~~~~~~