Friday, December 18, 2015

Learn to grid materials with v-ray for Sketchup

This nice sketchup v-ray tutorial is presented by W design corp. This v-ray tutorial will provide step-by-step guidance on how to grid materials in v-ray for sketchup.

This sketchup tutorial is specifically designed for advanced sketchup users who have good knowledge in modeling and sketchup materials.


~~~~~~~~~~~~~~~~~~~~~~~
Published By
Rajib Dey
~~~~~~~~~~~~~~~~~~~~~~~

Wednesday, December 16, 2015

How to use Sketchup for creating snow flakes

This sketchup video will help the sketchup users to learn how to produce snowflakes instantly through various sketchup components.

Some useful sketchup tools like move, rotate, eraser, line tool etc. are used here to make the scene. This video is a part of sketchup skill builder series.


~~~~~~~~~~~~~~~~~~~~~~~~
Published By
Rajib Dey
~~~~~~~~~~~~~~~~~~~~~~~~

Tuesday, December 15, 2015

How to obtain 3d view of construction details with Sketchup and PlusSpec

This is another useful tutorial from RubySketch through the sketchup youtube video. Here one can get brief information on how sketchup and PlusSpec can be integrated to provide 3D views of construction details.

PlusSpec is considered as the most powerful 3D, 2D and Cad software that can provide the following benefits to the Architects, Builders, Estimators, Manufacturers etc.
  • Design and Draft process is accelerated upto 10 times
  • Estimating process is increased upto 50 times
  • Accomplish remarkable Feasibility Studies
  • Easily drag & drop manufacturers products and materials in your project
  • Provide Virtual Design & Construct with Building Information Modelling
Download all the construction details from the following link at free of cost.https://3dlibrary.rubysketch.com/brands/pronto-panel

Download PlusSpec https://plusspec.com/


~~~~~~~~~~~~~~~~~~~~~~~~
Published By
Rajib Dey
~~~~~~~~~~~~~~~~~~~~~~~~

Monday, December 14, 2015

How to design a spiral staircase with Sketchup

Follow my blog with Bloglovin
This sketchup tutorial is designed for basic and advanced users of sketchup. The tutorial shows how to create the drawing & design of a spiral staircase with sketchup make.

Sketchup is the most effective design tool to generate 3d models and exterior architecture.


~~~~~~~~~~~~~~~~~~~~~~~~
Published By
Rajib Dey
~~~~~~~~~~~~~~~~~~~~~~~~


Sunday, December 13, 2015

Learn how to export VRmat materials from V-ray Sketchup to 3ds Max

This is an exclusive video for sketchup vray users. This sketchup youtube video will introduce you to a new script that can speed up the process for exporting all VRmat materials from sketchup to 3ds max.

The script can be downloaded from the link given below :- sketchucation.com

VRmats refer to material presets which only support the V-ray renderer. In V-Ray 3.0, VRmats is presented as a new extension format.

With V-Ray VRmat Materials the user can load a V-Ray shader from a file (.vrmat, .vismat, .vrscene) and apply them in the scene. These files can be exported from 3ds Max or Maya and compatible with any platform. The users will be able to run the shader directly or modify its settings by selecting the Show VRmat Editor button.


~~~~~~~~~~~~~~~~~~~~~~~~
Published By
Rajib Dey
~~~~~~~~~~~~~~~~~~~~~~~~

Thursday, December 10, 2015

How to set up light & light setting for interior rendering of a bed room with V-ray Sketchup

This is another exclusive sketchup tutorial from youtuber Sketchup Phan Thuc. In this tutorial one can learn how to apply v-ray for sketchup for interior rendering of a bedroom after arranging and providing light setting.


V-ray for Sketchup

~~~~~~~~~~~~~~~~~~~~~~~~
Published By
Rajib Dey
~~~~~~~~~~~~~~~~~~~~~~~~

Wednesday, December 9, 2015

Daylight Optimisation with Sefaira for SketchUp

sefaira for sketchup

2030Studio were commissioned to design a family home in the coastal city of Balneário Camboriú, in Santa Catarina, Brazil. The design for the three bedroom house would need to create strong inside-outside connections bearing in mind that cost would be a significant consideration and qualification for any sustainability strategy.

Project Stats
Project type: Residential
Location: Balneário Camboriú, SC, Brazil
Client: Gabriella Buckstegge
Building type: House
Floor area/Occupancy: 360m2 / 3 stories / A family of 4
Project stage & completion date: Design development / Dec 2016
Budget: Withheld

sefaira for sketchup

Location of the main house and its surroundings

sefaira for sketchup

Annual shading analysis

Approach: The 2030Studio team’s initial design, that placed private rooms on the upper floor and the more public spaces below, established a strong connection between inside and outside whilst ensuring privacy for the home’s residents. Large glazed openings frame desirable views of a national nature reserve just behind the site and ground floor spaces open up to connect to the back garden. While these indoor-to-outdoor connections were compelling, the design team was concerned that they would have a negative impact on solar gains and glare within these spaces.

To test their assumptions, the team created a whitebox model based on this initial concept, and analyzed it using Sefaira’s realtime plugin and daylight analysis feature.

sefaira for sketchup
Initial Sefaira daylight analysis showing overlit and underlit areas

Initial results showed a good sDA level (84%) but a high ASE value (31%). Once the problems were clearly diagnosed, it was possible to develop the concept and improve the overall daylight performance. To tackle the overlit and underlit areas, the team:

added shading projections and light shelves to the main patio to prevent glare in the spa and dining area;
introduced clerestory windows to bring daylight deeper into space;
sefaira for sketchup
Rendering by 2030Studio showing shading projections and clerestory windows

Results: Using Sefaira, 2030Studio were able to analyze their proposed solutions to ensure better daylight distribution across all spaces; they were able to significantly reduce glare in most spaces, driving ASE levels down from 31% to 9%. Implementing the shading strategies reduced sDA by only 3% — thus keeping the average daylight levels high within all spaces. In addition to a well lit interior and better visual comfort, they were able to reduce EUI by 17% (from 97kWh/m2/yr to 80kWh/m2/yr).
sefaira for sketchup
Sefaira Daylight Analysis showing improved daylight distribution

2030Studio used Sefaira analysis results and additional renderings to illustrate the impact of shading features on the building’s overall aesthetics as well as how the proposed changes actually improved daylighting throughout the home’s interior.

sefaira for sketchup

~~~~~~~~~~~~~~~~~~~~~~~
Published By
Rajib Dey
~~~~~~~~~~~~~~~~~~~~~~~

Sunday, December 6, 2015

Gabster LITE for Sketchup

Gabster develops Gabster LITE for sketchup. This sketchup extension supports SketchUp 8, SketchUp 2015. This sketchup extension is available in Brazilian Portuguese, English.

Gabster LITE extension facilitates the sketchup users to get access to the extensive library of dynamic components useful for generating custom-made furniture in Sketchup. This version allows the users to produce 3D models by applying some items of Gabster’s dynamic gallery and have a real-time experience.

There is also Pro version of Gabster, the user can download it from here


~~~~~~~~~~~~~~~~~~~~~~~~
Published By
Rajib Dey
~~~~~~~~~~~~~~~~~~~~~~~~

Saturday, December 5, 2015

Chaos Group Launches V-Ray for Revit Public Beta

High-Performance Rendering Now Integrated into Architecture’s Leading Design Platform; Free Download Available Now.

BALTIMORE, MD. – December 1, 2015 – Today, Chaos Group announces the V-Ray for Revit Public Beta. Intelligently integrated into Autodesk Revit, V-Ray’s core rendering technology has been tailored to meet the needs of architects at all stages of the design process – from concepting to VR.

After extensive feedback from firms across the world, V-Ray for Revit has been designed to fit seamlessly into production, providing powerful rendering with streamlined controls. A familiar interface and easy-to-use presets help new users start taking advantage of V-Ray’s proven capabilities quickly; while advanced post-processing and a stereoscopic VR camera set them up for creative success down the line.

"At last, V-Ray for Revit can complement our current digital design toolset!” said Jorge Barrero, Senior Associate at Gensler. “It’s already fast and dependable, and since it supports all V-Ray packages, it’s going to be the connective tissue that ties many of our digital design tools together.”

V-Ray for Revit establishes a unified visualization pipeline, linking together V-Ray for SketchUp, Rhino and 3ds Max, which will make projects more efficient, and designs more reliable as they move across multiple platforms. Revit cameras, lighting and materials are all supported as well, ensuring a simple adoption process.

“V-Ray for Revit fills a major gap in design development,” said Brian Russell, V-Ray for Revit project manager. “Now anyone can get exciting, predictable results at any stage of the project.”

Availability

V-Ray for Revit public beta is available as a free download. After creating an account on chaosgroup.com, users can follow the link at the V-Ray for Revit product page to register.
V-Ray for Revit supports:
  • Revit Architecture 2015, 2016
  • Revit MEP 2015, 2016
  • Revit Structure 2015, 2016
  • Revit “Onebox” (Building Design Suite) 2015, 2016
About Chaos Group: Chaos Group creates physically-based rendering and simulation software for artists and designers. Founded in 1997, Chaos Group has devoted the last 18 years to helping artists advance the speed and quality of one of their most important tools. Today, Chaos Group’s photorealistic rendering software, V-Ray®, has become the rendering engine of choice for many high-profile companies and innovators in the design and visual effects industries.

Press Contacts:
Liaison Inc.
Colin McLaughlin,(503) 796-9822, colin@liaisonpr.com
www.liaisonpr.com


~~~~~~~~~~~~~~~~~~~~~~~
Published By
Rajib Dey
~~~~~~~~~~~~~~~~~~~~~~~

Thursday, December 3, 2015

How to create 3D textures using Sketchup

The SketchUp plug-in for Maxwell Render offers a whole host of functions that enable the user to create a wide range of textured materials. If you're specifically interested in creating a densely textured rug then Maxwell Grass is your friend.

This feature (known as a Maxwell Render extension) can be accessed directly within the SketchUp interface via the SketchUp plug-in for Maxwell Render.

Officially it's called Maxwell Grass but don't let the name throw you: this extension has such a high number of unique parameters that it's possible to create textures that are ideal not only for grass textures, but also carpet and rugs.
Maxwell Grass basically generates geometry for selected groups in SketchUp once the scene has been exported to Maxwell Render.

It's all about the RAM: Pro tip: If only a small portion of the rug will be visible in the final render, use the Level of Detail parameter to render more blades near the camera and gradually less blades as the distance from the camera increases, thereby saving that precious RAM.

3d textures using sketchup
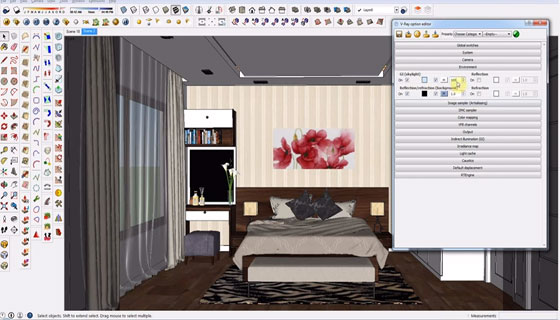
A densely textured rug created using Maxwell Grass

How to get started: To get started, select the group and then click on the Maxwell Grass icon in the SketchUp toolbar. A new window will open with a range of settings. Here you have the ability to specify the parameters of how you'd like the grass (or in this instance fur) to appear.

The Primitive setting is the first step in specifying the colour, shape and thickness of the blades, including the number of points (segments).

In my scene I chose the Cylinder setting and opted for quite thick individual strands. Just remember that RAM usage will increase depending on which type of Primitive you choose and the associated number of points.

3d textures using sketchup
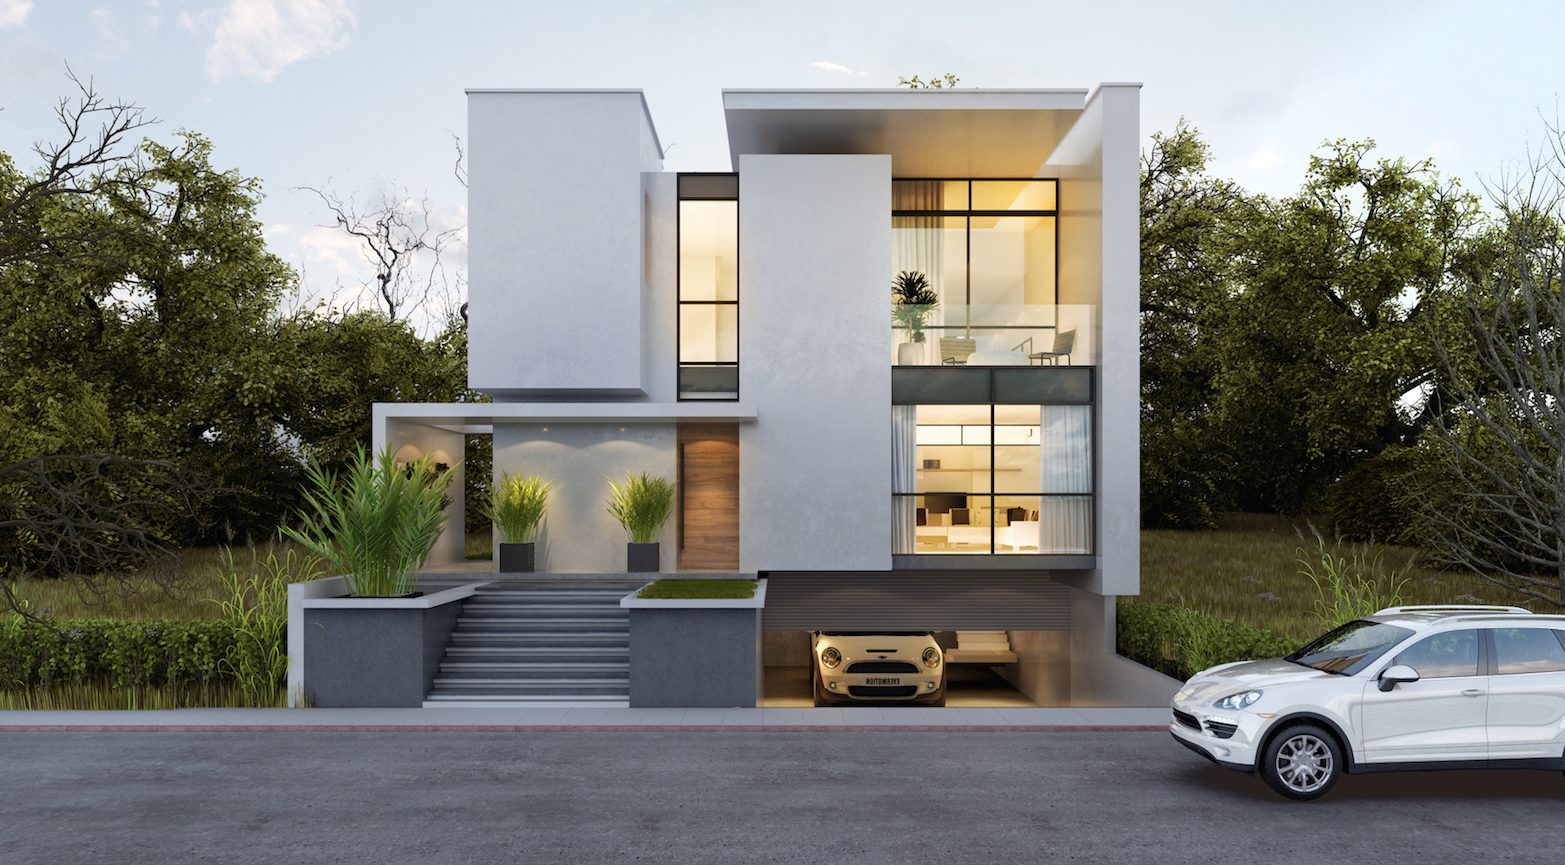
Maxwell Green is ideal for carpets and fur - click on the image to see a larger version

The density and length of the blades can be specified according to preference and a very useful randomiser can be used to vary the length according to the percentage input.

The Maxwell Grass extension also includes Bend parameters. These control the bending of each strand of blade, at what length it starts bending, the angle it bends, and the bending radius (with randomisers for each).

The Bend parameters are invaluable when trying to recreate the behaviour of densely textured fur rugs and provide a high level of accuracy and realism.

Explore additional functionality of Maxwell Grass by using Maxwell Studio to add gradient and texture maps to further refine and enhance.


~~~~~~~~~~~~~~~~~~~~~~~
Published By
Rajib Dey
~~~~~~~~~~~~~~~~~~~~~~~

Wednesday, December 2, 2015

How to use sketchup 2016 for creating the layout of a building

This wonderful sketchup tutorial video is presented by Paul J. Smith to teach you how to connect any sketchup model to Layout and produce professional type plans, views, and elevations.

The video starts with SketchUp interface and workflow, and later on plunges into a typical residential building project by focusing on generating the site plan to building the walls, floor, and roof of a house.


~~~~~~~~~~~~~~~~~~~~~~~~
Published By
Rajib Dey
~~~~~~~~~~~~~~~~~~~~~~~~

Tuesday, December 1, 2015

Sketchup 2016 brings upgraded functionalities for LayOut

Sketchup 2016 brings upgraded functionalities for LayOut
Image Courtesy: blog.sketchup.com
Layout is one of the vital feature of sketchup. In sketchup 2016, the functionalities of layout have been modified significantly.

LAYERS AND GROUPS: The sketchup users can now find a better way for arranging LayOut files. With new and improved layers, it becomes easier to group elements over several layers, drawing on assigned layers as well as exposing the bottom of a bundled viewport.

There are new tool colors and highlights which will inform you while generating or choosing entities on a shared layer. Entities illustrate a diverse highlight color and tool colors are not similar while making drawing on a shared layer.

Sketchup 2016 brings upgraded functionalities for LayOut
Image Courtesy: blog.sketchup.com
Now layers contain a new document capability alias multi-layer groups and the entities on various layers can be easily grouped collectively.

This new grouping structure will make the process simple to cut and paste over pages, categorize identical entities (like dimensions) over diverse pages and layers as well as locate the the things in your document.

Sketchup 2016 brings upgraded functionalities for LayOut
GIF Courtesy: blog.sketchup.com
SMALL DIMENSIONS: The dimension system 

(http://help.sketchup.com/en/article/3000222) of layout is also significantly improved. Now the users can instantly generate dimension chains by clicking twice 
(http://help.sketchup.com/en/article/152653). The users can also deal with dimensions in small spaces with LayOut. Now, if the dimension text is very large for the space to be dimensioned, LayOut will automatically pop text out to the side while drawing though a completely adjustable leader line.

Sketchup 2016 brings upgraded functionalities for LayOut
GIF Courtesy: blog.sketchup.com
Small dimensions will save huge time while you are navigating the mess of lines and shapes that might finally converted to a nice well-bred PDF. The PDF Exporter of LayOut has also been upgraded. PDF exports become 10-15x smaller.

~~~~~~~~~~~~~~~~~~~~~~~~
Published By
Rajib Dey
~~~~~~~~~~~~~~~~~~~~~~~~