Monday, August 24, 2015

How to use Profile Builder 2 for generating Parametric Wall Assemblies in SketchUp

Profile Builder 2 offers lightspeed modeling concerning smart building materials by attaching parametric profiles and assemblies. Besides, Profile Builder 2 extension is useful to sketch advanced wall assemblies while the extension is operating.

Profile Builder 2 only support sketchup 2015. The users can download unlimited free profiles like AISC Steel Shapes (C, HSS, L, S, W), AITC Glulam Profiles, over 1400 Moulding Profiles, Handrails, Lumber, Concrete curbs etc.

John Brock of BrockWorks, Inc. has presented an exclusive video demonstration that shows how Profile Builder is used to produce 3d foundation walls from 2D wall sections which belong to his own convention, parametric wall assemblies.

Watch the demo video:


For more information, visit profilebuilder4sketchup.com

Profile Builder 2

~~~~~~~~~~~~~~~~~~~~~~~~~
Published By
Rajib Dey
~~~~~~~~~~~~~~~~~~~~~~~~~

Thursday, August 20, 2015

MF random building generator – An exclusive sketchup plugin

It is very challenging to code ruby plugin for sketchup. In this regard, Wingnang Fan has developed a useful plugin alias Random Building Generator. Watch the following demo video of the plugin.

This sketchup extension will allow the users to produce a group of boxes having arbitrary sizes which seem to be a group of building blocks. The users will be able to memorize their input values which will be assigned to the building group and saved with sketchup file. In future, if the user prefers to close and open file, the input value will exist there.

The values can be recovered for producing another. As a final point, the settings can be exported to a csv file.


Trimble Connect for SketchUp
Image Courtesy: extensions.sketchup.com
We want to feature this page: sketchup4architect.com/sketchup-plugins

~~~~~~~~~~~~~~~~~~~~~~~~~
Published By
Rajib Dey
~~~~~~~~~~~~~~~~~~~~~~~~~

Mike Brightman presents the part 1 series of sketchup model types tutorial

Mike Brightman offers an exclusive sketchup video that is the part of sketchup turial series of Brightman Designs. This sketchup tutorial will teach you how to transmit a 3d textured Match Photo model into a accessible Render Ready conditions model, and finally walkthrough a Lumion 3d virtual tour through a GastroPub sample project.

To get the complete tutorial, visit brightmandesigns.com


Profile Builder 2

~~~~~~~~~~~~~~~~~~~~~~~~~
Published By
Rajib Dey
~~~~~~~~~~~~~~~~~~~~~~~~~

Thursday, August 13, 2015

Create the custom design of Kitchen with Sketchup

This is an exclusive sketchup online tutorial which is presented in part 1 and part 2 series. This sketchup tutorial will teach you how to create the layout design of a kitchen by applying various sketchup components.

Download sketchup components for kitchen, bath and custom design.


Video presentation part 1


Video presentation part 2


~~~~~~~~~~~~~~~~~~~~~~~~~
Published By
Rajib Dey
~~~~~~~~~~~~~~~~~~~~~~~~~

Tuesday, August 11, 2015

Now electrical contractors can experience better workflow with Trimble MEPdesigner for SketchUp 2.0

Trimble just released the most updated version of its flagship product alias Trimble MEPdesigner for SketchUp 2.0. It is an exclusive extension to SketchUp Pro that provides huge benefits to mechanical, electrical and plumbing (MEP) contractors and engineers by enhancing their productivity as well as simplifying the usages with various 3D CAD and BIM applications.

The performance of this new version is greatly enhanced with the inclusion of a superior electrical construction materials catalog and extended component patterns together with a bendable electrical conduit feature. These consist of EMT, IMC, PVC and RMC, which empower contractors and engineers to model electrical systems in a perfect manner for any construction projects.

The design progression is also streamlined with a new bendable conduit feature. With this improved feature, the users can now get rid of the issue for applying a series of components to provide a bend in the conduit. It will save significant time and generate perfect 3D model and bill of materials (BOM).

The SketchUp users will be able to download unlimited user generated models from 3D Warehouse. To support the release of version2.0, Trimble has circulated 3D models of electrical components along with panelboards, lighting panels and transformers which can be downloaded here.

Trimble is going to organize a series of workshops by offering practical trainings with Trimble MEPdesigner forSketchUp and these training programs will be very useful for electrical contractors. Besides, the contractors can participate in the webinar “Getting Started with 3D Modeling” that will be held on August 11, 2015.

Availability
The users can access Trimble MEPdesigner for SketchUp from the SketchUp Extension Warehouse.

For more information, visit mep.trimble.com

Trimble MEPdesigner for SketchUp 2.0

Image Courtesy: www.tenlinks.com/


We want to feature this page: sketchup4architect.com/sketchup-plugins

~~~~~~~~~~~~~~~~~~~~~
Published By
Rajib Dey
~~~~~~~~~~~~~~~~~~~~~

Monday, August 10, 2015

7 tips when starting 3D Printing

Our tech club at middle school of late had a chance of receiving a new 3D Printer donated by someone... We're also lucky enough to have a go-getting 8th grader with some knowledge of 3D printing at home who took the lead in recommending, ordering and setting up the 3D Printer. http://www.mkrclub.com/ has published this blog.

7 tips when starting 3D Printing
Image Courtesy: mkrclub.com
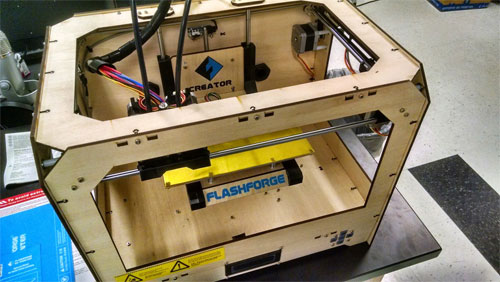
It was all set up (Flashforge, dual Extruder!), of course the printing fun starts - and so did the learning.
The small lessons we learned seemed worth sharing:

1 - Don't rush the printer set up: This one in fact is more than just one tip - but too involved to provide details here. Let's just say a 3D Printer is not a toaster - you likely won't be capable taking it out of the box, turn it on, and just begin toasting stuff.

There are key things to get right, and if your printer company doesn't give details it well (you shouldn't have carried that particular printer, and) you should go right to YouTube or the web and find people who have done it before. Bed-leveling, Software setup, Printer configurations for the filament you have, filament loading, and especially bed preparing to make sure your models will stick to the bed. This can get much complex - so have a knowledgeable person on hand if at all possible. We found bed adhesion to be the trickiest part - so be prepared to get some painters tape or kapton or hairspray (yes, hairspray).

7 tips when starting 3D Printing
Image Courtesy: mkrclub.com
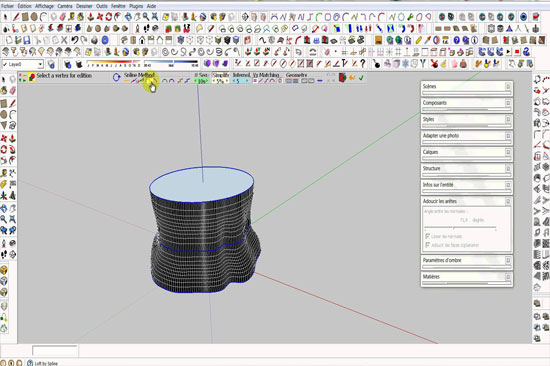
2 - Start Modeling Early: Now before you get a printer, try some #3Dmodeling apps and make things that you will at last print. I use Autodesk 123D Design. Tech Club uses TinkerCad - both very trouble-free. A very big portion of the learning is in the modeling, not just the physical printing. Kids who have many hope of printing custom objects, parts, kits, etc, will need this skill. The father of the 8th grader who set up the school's printer has a great regulation at home – “If you didn't model it yourself, you can't print it.” That's a motivational rule I really like for schools.

7 tips when starting 3D Printing
Image Courtesy: mkrclub.com
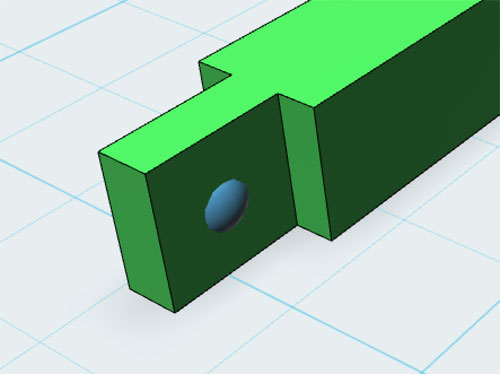
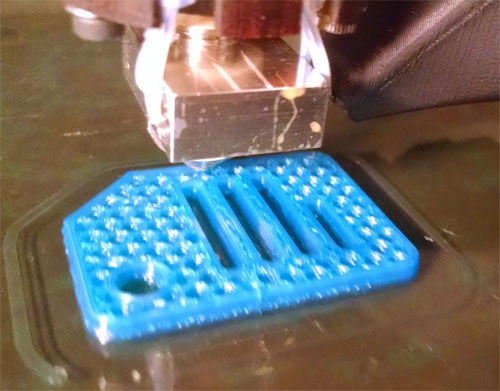
3 - Print Small Models: There's characteristically more than one person waiting to print something - and if you print something that takes hours to print, 1) you'll reduce the motivation for those waiting to print. 2) You'll simply decrease the experimentation and your competence would be leaning. You learn more with every print - so print lots of projects, not less large projects, and 3) You'll misuse resources - since failures (perhaps common in the early days) will take lots of material and time.

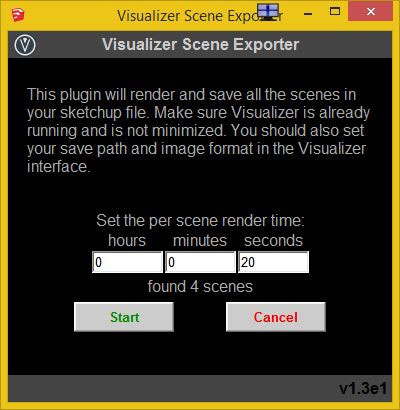
4 - Start Simple (e.g. no dual extrusion): There are lots of ways to make a project more complicated - but save those for later. If you suppose to get a dual extruder (we were so lucky!) - It means you can print in two colors - but don't! Wait till you get the hang of simple things. If you are tempted to use a sculpting app which takes 360 view of your principal and prints her - don't! Save that for week 2 (or week 22). Get the basics down, and then advance.

7 tips when starting 3D Printing
Image Courtesy: mkrclub.com
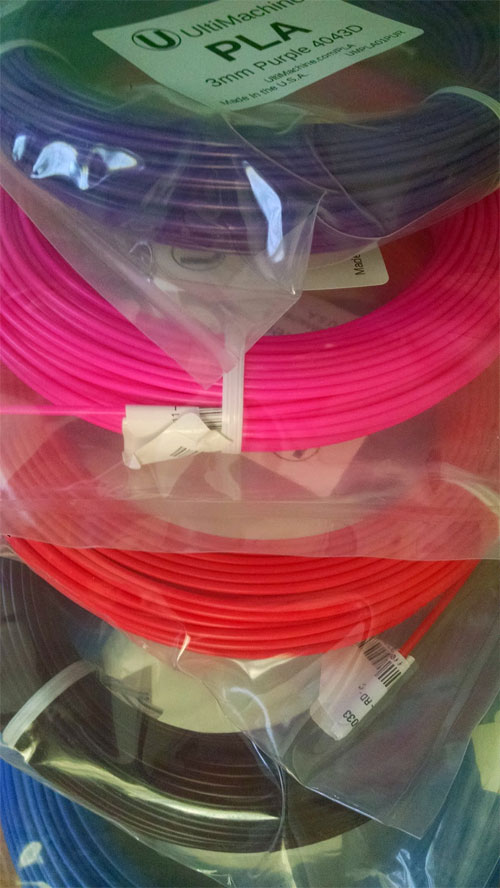
5 - Start with PLA Filament: While the blog writer doesn’t have any useful data or facts here - there is the belief that ABS, since it is petroleum-based, gives off bad smelling fumes more than PLA, which is corn-based (and actually smells sweet when it extrudes). Again - no data here - but it seems PLA has less concern than ABS, especially if the printer is in an unaired space. Some articles I found on this topic range from the not so frightening to the worst-thing-since-poison. He thinks there needs to be more facts here, which leads me to consider a conservative approach is best to start.

6 - Model and Print semi-useful things: Motivation on the part of students and team members - to learn modeling and work through problems - will be much more simply maintained if they can experience real benefits from their efforts. Attractive trinkets for your desk will only last in a brisk of time - but even a pencil holder or a pegboard hook will give a greater sense of achievement and will even excite the parents.

7 - Document your failures and successes: Start a journal - could be a blog, a spreadsheet, a folder with project write-ups and results - to give the people modeling and printing a place to share what they learn and to continually build up the knowledge of the team and others. This is also great to educate the scientific method. Ask students to form a theory each time they change something in their project and document the results. You'll be amazed at the amount of testing you end up doing.

7 tips when starting 3D Printing
Image Courtesy: mkrclub.com
Ref: www.mkrclub.com

~~~~~~~~~~~~~~~~~~~~~~~~
Published By
Rajib Dey
~~~~~~~~~~~~~~~~~~~~~~~~

Friday, August 7, 2015

Create a model with CurviLoft sketchup plugin & render it with Keyshot

Paulo Corceiro presents a learning video for beginner’s sketchup users. In this video, one can learn how to use CurviLoft sketchup plugin. CurviLoft is developed by Fredo6 and this sketchup plugin support SU6, SU7, SU8, SU13 and SU15. This plugin is useful for loft and skinning geometries as well as producing surfaces from contours.

Besides, this sketchup video also focuses on how to render the model created with CurviLoft through Keyshot 5, the sophisticated 3d rendering & animation software.


Create a model with CurviLoft sketchup plugin & render it with Keyshot 5
Image Courtesy: youtube.com

We want to feature this page: sketchup4architect.com/sketchup-plugins

~~~~~~~~~~~~~~~~~~~~~
Published By
Rajib Dey
~~~~~~~~~~~~~~~~~~~~~

Tuesday, August 4, 2015

VSE_VisualizerSceneExporter for sketchup

Lester Pears has developed VSE_VisualizerSceneExporter for sketchup. This exclusive sketchup add-on supports SketchUp 2014, SketchUp 2015.

The sketchup users can use this sketchup extension to render (Visualizer renders of sketchup files through various scenes) and save all the scenes within sketchup files. But the users should ensure that visualizer is already activated and is not minimized. This sketchup extension will save the predefined images for every scenes in a sketchup file.

The users should also arrange their save path as well as image format within the boundary of Visualizer. The users can assign the render time that can be applied in hours, minutes and seconds. VSE_VisualizerSceneExporter calculates the location of saved images as well as the images renamed with the scene titles.
VSE_VisualizerSceneExporter for sketchup is available in sketchup extension warehouse.


Visualizer Scene Exporter for sketchup

Image Courtesy: extensions.sketchup.com
We want to feature this page: sketchup4architect.com/sketchup-plugins

~~~~~~~~~~~~~~~~~~~~~~~
Published By
Rajib Dey
~~~~~~~~~~~~~~~~~~~~~~~